
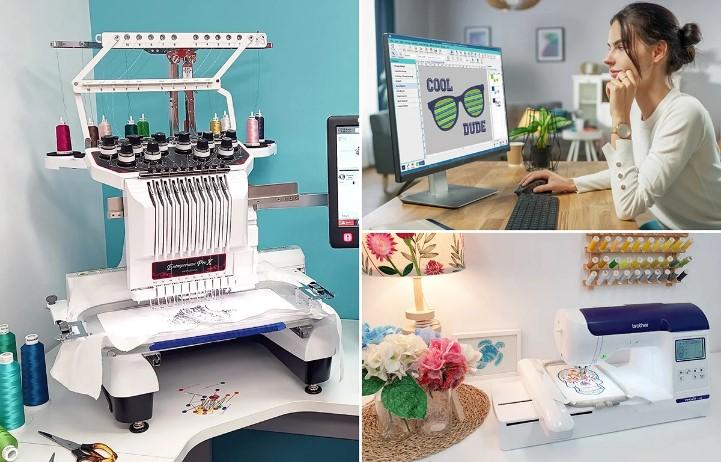
If you want your logo to look sharp, professional, and long-lasting on fabric, you must Digitize Logo For Embroidery the right way. Whether it’s for caps, uniforms, jackets, bags, or promotional merchandise, embroidery digitizing is the bridge between your digital artwork and flawless stitched results. A well-digitized logo ensures smooth stitching, accurate colors, clean edges, and durability through repeat washing and heavy use.
In this complete guide, you’ll learn how a logo moves from vector art to a stitch-ready embroidery file, why professional digitizing matters, how the process works, common mistakes to avoid, and how to get perfect embroidery results every time.
What Does It Mean to Digitize a Logo for Embroidery?
Digitizing is the process of converting your logo image into a special file that embroidery machines can understand. Unlike printing, embroidery machines don’t read images, they read stitch instructions. These instructions tell the machine:
- Where each stitch should go
- Which direction the stitch should run
- When to change thread colors
- How dense the stitches should be
Without this step, your logo simply cannot be embroidered properly, no matter how high-quality the original image is.
Why Vector Art Is the Best Starting Point
Vector files such as AI, EPS, PDF, and SVG are the gold standard for logo digitizing. Unlike raster images (JPG, PNG), vector art:
- Maintains clean lines at any size
- Has defined shapes and paths
- Makes digitizing faster and more accurate
- Reduces guesswork for stitch placement
If your logo isn’t already in vector format, it’s usually converted before the embroidery digitizing process begins.
The Step-by-Step Process: From Vector Art to Stitch-Ready File
1. Artwork Review
The first step is inspecting your logo for:
- Small details
- Thin text
- Color transitions
- Shading or gradients
- This helps determine how the design will behave when stitched.
2. Manual Digitizing (Not Auto-Trace)
Professional digitizing is done manually using embroidery software. Every stitch is hand-placed by a digitizer. Auto-digitizing may be fast, but it creates messy stitch paths, uneven density, and poor results.
3. Underlay Stitch Setup
Underlay stitches stabilize the fabric and support the top stitches. This prevents puckering and helps the top stitches lay smoothly, especially on stretchy or thick fabrics.
4. Stitch Direction Planning
Stitch direction affects how light reflects off the thread. Proper direction creates:
- Visual depth
- Clean texture
- Smooth curves and transitions
5. Density & Pull Compensation
Fabric pulls during stitching. Professional digitizers adjust thickness, spacing, and stretch compensation to prevent gaps and distortion.
6. File Conversion to Machine Format
The finished design is exported into the correct machine file such as:
- DST (Tajima)
- PES (Brother & Babylock)
- JEF (Janome)
- EXP (Melco)
- VP3 (Viking & Pfaff)
Now the logo is officially stitch-ready.
Why Professional Logo Digitizing Is So Important
Poor digitizing leads to:
- Thread breaks
- Misaligned stitches
- Puckered fabric
- Distorted lettering
- Uneven fills
Professional digitizing ensures:
- Clean, sharp edges
- Smooth curves
- Long-lasting durability
- Professional branding
- Faster production
When you invest in quality digitizing, your embroidery machines run better, faster, and with fewer errors.
Types of Logos That Can Be Digitized
- Business logos
- Sports team logos
- School emblems
- Fashion brand marks
- Custom monograms
- Event and club logos
No matter the style, expert digitizing ensures accurate embroidery output across all materials.
Logo Digitizing for Different Fabric Types
Cotton & Twill
Easy to digitize with standard stitch density.
Caps & Hats
Require center-out digitizing with foam-friendly stitch patterns.
Stretch Fabrics
Need lighter density and strong underlay to prevent distortion.
Leather & Denim
Require wider stitches with lower needle penetration.
Each fabric behaves differently, which is why experienced digitizing is critical.
Flat Embroidery vs 3D Puff Digitizing
Flat Embroidery
- Traditional embroidery style
- Clean and smooth surface
- Ideal for shirts, jackets, patches
3D Puff Embroidery
- Raised foam design
- Bold and eye-catching
- Best for hats, sportswear, and branding
Different digitizing strategies are used for each style to achieve the right effect.
Benefits of Digitizing Logo for Embroidery
- Machine-ready stitch files
- Clean and professional branding
- Reduced thread breakage
- Faster stitching time
- Long-lasting durability
- Consistent results across bulk orders
- Works on all embroidery machines
Quality digitizing transforms a simple logo into a production-ready brand asset.
Common Mistakes in Logo Digitizing
- Using auto-digitizing software
- Incorrect stitch density
- Poor underlay setup
- Wrong stitch direction
- No pull compensation
- Ignoring fabric type
Avoiding these mistakes saves time, money, and production headaches.
File Formats & Machine Compatibility
Popular embroidery machine formats include:
- DST – Tajima & commercial machines
- PES – Brother, Babylock
- JEF – Janome
- EXP – Melco
- VP3 – Pfaff & Viking
Your digitized logo must match your machine format for smooth stitching.
Who Needs Professional Logo Digitizing?
- Embroidery shops
- Clothing brands
- Promotional product companies
- Sports teams
- Marketing agencies
- Print-on-demand businesses
- Home-based embroidery sellers
Anyone producing embroidered items at scale depends on professional digitizing.
How Long Does Logo Digitizing Take?
- Simple logo: 4–12 hours
- Medium detail: 12–24 hours
- Complex full-color logos: 24–48 hours
Rush options are often available for urgent production schedules.
What Affects the Cost of Logo Digitizing?
- Stitch count
- Complexity
- Number of colors
- File format required
- Turnaround time
Simple logos cost less, while detailed artwork with shading and gradients costs more.
Why Good Digitizing Saves Money in the Long Run
High-quality digitizing:
- Reduces machine downtime
- Prevents ruined garments
- Saves thread and labor
- Speeds up production
- Improves customer satisfaction
Cheap digitizing often leads to costly production errors.
From Logo to Full Brand Identity
Once your logo is digitized correctly, it can be used across:
- Uniforms
- Caps
- Tote bags
- Jackets
- Hoodies
- Promotional giveaways
A single stitch-ready logo becomes a powerful branding tool when digitized professionally.
Tips for Getting the Best Digitized Logo Results
- Always submit clean vector artwork
- Mention fabric type and size requirements
- Specify your machine format
- Ask for test stitch samples
- Work with experienced digitizers
These steps ensure perfect embroidery results every time.
The Future of Logo Embroidery Digitizing
With advancements in software and precision equipment, digitizing continues to evolve with:
- Faster turnaround times
- Improved shading techniques
- Hyper-clean stitch control
- Advanced 3D puff effects
Professional digitizing remains a craft that blends technology with artistic precision.
Final Thoughts
Learning how to Digitize Logo For Embroidery the right way is essential if you want clean, professional, and long-lasting stitching results. From vector conversion and manual stitch placement to fabric-specific adjustments and machine-ready formatting, every step matters. Whether you’re building a clothing brand, managing an embroidery shop, or launching custom merchandise, quality digitizing directly impacts your reputation and product value.
For accurate, affordable, and production-ready logo digitizing that delivers smooth stitches and sharp branding, thousands of creators trust Digitizing Buddy for their embroidery success.

 Arabic
 French
 Spanish
 Portuguese
 Deutsch
 Turkish
 Dutch
Dutch
 Italiano
 Russian
 Romaian
 Portuguese (Brazil)