
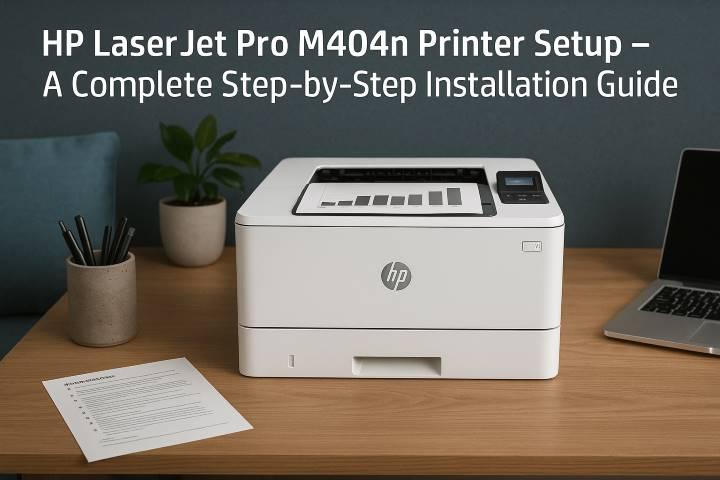
When it comes to office printing, time is money. Every second wasted on a faulty setup or a driver error adds up. That’s why professionals trust the HP LaserJet Pro M404n—a machine built for those who value speed, clarity, and zero nonsense.
If you’ve recently bought this powerhouse printer and want to set it up the right way—without wrestling with confusing tech terms—this detailed guide is your blueprint to a flawless HP LaserJet Pro M404n Printer setup.
Meet the HP LaserJet Pro M404n—Built for Efficiency
Before diving into setup, let’s understand what makes this printer tick.
The HP LaserJet Pro M404n isn’t your typical office gadget. It’s a monochrome laser printer designed purely for performance and consistency.
Top Specs at a Glance:
-
Print Speed: Up to 40 pages per minute
-
Print Resolution: 1200 x 1200 dpi
-
Processor: 1200 MHz
-
Paper Capacity: Up to 350 sheets
-
Connectivity: USB 2.0, Ethernet
-
Monthly Duty Cycle: Up to 80,000 pages
This printer focuses on one thing—black-and-white printing—and does it with unmatched precision. Whether you’re managing invoices or bulk reports, the M404n delivers crisp prints that look clean and professional every time.
Pre-Setup Checklist – Prepare Before You Power On
Before connecting your printer, make sure you’ve got everything ready. Proper prep prevents unnecessary installation headaches later.
Here’s your checklist:
-
A stable workspace (flat, dust-free surface).
-
Uninterrupted power supply.
-
USB or Ethernet cable (depending on your connection type).
-
Latest printer drivers (downloadable from HP’s official website).
-
A computer or laptop with administrative access.
Keeping these in check ensures your setup process goes smoothly—no random “connection not found” alerts halfway through.
Unboxing and Initial Setup
When you first unbox the HP LaserJet Pro M404n, the packaging is secure but straightforward.
What’s Inside the Box:
-
HP LaserJet Pro M404n Printer
-
Pre-installed HP 58A Toner Cartridge
-
Power Cable
-
Setup Documentation
-
USB or Ethernet Cable (varies by region)
Steps to Unbox Properly:
-
Remove all protective plastic and orange packing tape.
-
Open the toner access door and pull out the cartridge.
-
Gently shake it 4–5 times to distribute toner evenly.
-
Remove the sealing strip before reinserting it.
-
Close the access door.
-
Plug in the power cord and press the Power button.
Once powered on, the printer performs a brief initialization. When the control panel lights stabilize, you’re ready for the next step.
Connecting the Printer—Choose Your Setup Path
The M404n supports USB and Ethernet connectivity—there’s no Wi-Fi.
That’s by design; HP built this model for secure, stable office use.
Option 1: USB Setup (For a Single Computer)
-
Connect your printer to your PC using the provided USB cable.
-
Power on the printer.
-
Windows may automatically detect and install basic drivers.
-
If it doesn’t, follow the manual installation process below.
Option 2: Ethernet Setup (For Network Printing)
If you want to share your printer across multiple systems:
-
Connect one end of the Ethernet cable to the printer.
-
Plug the other end into your router or network switch.
-
Turn on the printer.
-
Print a Network Configuration Page from the control panel.
-
Navigate to Reports → Network Summary → Print.
-
Note down the IP address listed.
You’ll use this IP later when installing the drivers.
Installing HP LaserJet Pro M404n Drivers and Software
The driver installation is the core part of your printer setup. It ensures your PC and printer communicate correctly.
Step-by-Step Installation (Windows):
-
Visit support.hp.com.
-
In the search bar, type HP LaserJet Pro M404n.
-
Under “Software and Drivers,” select Windows.
-
Download the Full Feature Software and Drivers package.
-
Run the downloaded setup file.
-
Follow the on-screen instructions carefully.
-
When prompted, select your connection type: USB or Network (Ethernet).
-
Complete the installation and restart your system if necessary.
Installation for macOS:
-
Go to HP’s support page and download HP Easy Start for Mac.
-
Open the installer and follow the guided setup.
-
Select your connection type (USB or Ethernet).
-
HP Easy Start automatically detects your printer and installs the correct driver.
Pro Tip: Keep HP Smart or HP Easy Start installed—they help manage print jobs, monitor toner levels, and handle firmware updates.
Adding the Printer Manually (If Not Auto-Detected)
Sometimes, the printer doesn’t appear automatically. No worries—here’s how to add it manually.
For Windows Users:
-
Open Control Panel → Devices and Printers → Add a printer.
-
Click The printer that I want isn’t listed.
-
Choose Add a printer using TCP/IP address or hostname.
-
Enter the IP address (from your printed network summary).
-
Select the appropriate HP driver when prompted.
For Mac Users:
-
Go to System Preferences → Printers & Scanners.
-
Click the + icon.
-
Choose your printer or select IP and enter the printer’s IP address.
-
Click Add to complete the process.
Loading Paper and Adjusting Print Preferences
Now that your printer is recognized, it’s time to set it up for real-world use.
Paper Loading Steps:
-
Pull out the main paper tray (Tray 2).
-
Adjust the side guides to fit your paper size.
-
Load paper print-side down.
-
Push the tray back in firmly.
Adjust Print Settings:
-
Paper Size: A4, Letter, or Legal.
-
Quality: Normal or Best (avoid “Draft” for official documents).
-
Duplex Printing: Enable two-sided printing if you want to save paper.
-
Toner Density: For darker prints, increase the density in driver settings.
These can be customized in your computer’s Printer Preferences window or through HP Printer Assistant.
Performing the First Test Print
It’s time for the moment of truth—your first print job.
On Windows:
-
Go to Control Panel → Devices and Printers → Right-click printer → Printer Properties → Print Test Page.
On macOS:
-
Navigate to Printers & Scanners → Select Printer → Options & Supplies → Utility → Print Test Page.
If the print looks sharp and clean, your HP LaserJet Pro M404n setup is successful.
Troubleshooting Common Setup Errors
Even with a top-tier printer, issues can arise during installation. Let’s tackle the most common ones.
Problem 1: Printer Not Found on Network
-
Verify Ethernet cable is connected properly.
-
Check the IP address and make sure it’s valid.
-
Restart both printer and router.
Problem 2: Poor Print Quality
-
Remove and gently shake the toner cartridge.
-
Run a cleaning cycle from the printer menu.
-
Replace toner if faded output continues.
Problem 3: Paper Jams
-
Open the rear access door and remove any stuck paper.
-
Ensure no scraps remain inside.
-
Don’t overload trays beyond their limit.
Problem 4: Slow Printing
-
Disable “High Quality” mode for regular documents.
-
Use Ethernet instead of USB for faster communication.
-
Update the firmware to the latest version.
Updating Firmware and Ensuring Printer Security
Firmware updates enhance printer stability, fix bugs, and sometimes improve speed.
How to Update Firmware:
-
Go to support.hp.com/drivers.
-
Search for HP LaserJet Pro M404n Firmware.
-
Download the latest version.
-
Run the installer while your printer is powered on and connected.
Security Settings You Should Configure:
-
Set an admin password for your printer.
-
Disable unused network protocols.
-
Enable automatic firmware updates.
-
Restrict access through HP JetAdmin or HP Security Manager.
These steps protect your office network from unauthorized print jobs and data interception.
Maintenance Tips for Long-Term Reliability
Like any machine, your printer rewards proper care. Regular maintenance prevents costly downtimes.
Essential Maintenance Routines:
-
Monthly Cleaning: Use a dry cloth to wipe the paper path and rollers.
-
Replace Toner Promptly: Low toner can cause streaks and uneven prints.
-
Avoid Dust: Keep the printer covered when not in use.
-
Paper Storage: Always use flat, moisture-free paper.
-
Use Genuine HP Supplies: Third-party toners can affect print quality and void the warranty.
Following these steps ensures your HP LaserJet Pro M404n runs smoothly for years.
Optimizing for Productivity
Once setup is complete, you can customize the printer for maximum office efficiency.
Productivity Boosts:
-
Set default print profiles (like duplex or draft mode).
-
Schedule automatic sleep mode for energy savings.
-
Enable auto toner notifications through HP Smart.
-
Use Quick Access Shortcuts in HP Printer Assistant for repetitive jobs.
These tweaks may seem small, but they add up to a faster, smarter workflow.
Why Professionals Choose the HP LaserJet Pro M404n
Let’s be honest—printers come and go, but few earn long-term trust in professional spaces. The HP LaserJet Pro M404n stands out because it does one job exceptionally well: deliver consistent, no-fail printing.
Top Reasons to Choose M404n:
-
Durable hardware for heavy workloads.
-
Minimal setup hassle.
-
Network-ready with secure printing options.
-
High-yield toner compatibility reduces per-page cost.
-
Energy-efficient design meets modern sustainability standards.
This isn’t just a printer—it’s a productivity partner.
Final Thoughts
Setting up the HP LaserJet Pro M404n Printer doesn’t have to be complicated. Once you follow the correct steps—from unboxing and driver installation to network setup and test printing—you’ll have a robust, reliable printer ready to tackle any office demand.
This printer is built for professionals who value results over gimmicks. With its high speed, excellent print quality, and rock-solid performance, it’s the kind of machine you set up once—and forget about, because it just works.
So, plug it in, configure it right, and let your documents fly. Your business deserves that kind of smooth efficiency.

 Arabic
 French
 Spanish
 Portuguese
 Deutsch
 Turkish
 Dutch
Dutch
 Italiano
 Russian
 Romaian
 Portuguese (Brazil)